
Preparedness for Kids - Part IV - Backpacks
- Butch Erskine

- Jul 15, 2019
- 6 min read
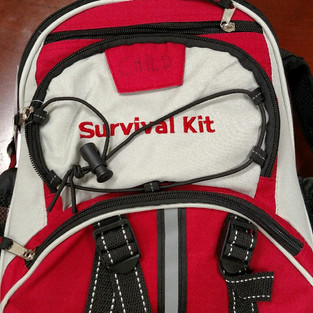
Steps for selecting and building your child's survival kit - You may have noticed numerous websites offering a prepacked back pack for children at a reasonable price. You may want to visit a store and take a look inside the bag to see if you approve of the quality and quantity of the items. Or, you can choose to buy a quality bag and pack your own. What is your child worth to you? You decide.
1. Step one is a very important step. You must decide which bag is the right backpack and then select the proper back pack for each child. You will want to select a quality back pack and one that is waterproof. You want a bag that is durable and can hold the items selected for contents for the child but also withstand the weather and time period the child will be carrying it. Backpacks can be costly so if you have multiple children and cost is a factor, consider buying one bag at a time until you fill the number needed. Make sure the selected backpack fits the child. Buy the appropriate size for your child's frame.
2. Step two is also important and step 1 and 2 are the two most important items you will want to buy quality products. Select an all season sleeping bag. You don't want to buy two separate sleeping bags, one for summer and one for winter. Simply buy a quality type all season sleeping bag. Do not try and save money by purchasing the cheaper item. Remember, you have no clue where you could end up at and what the weather condition may be when the sleeping bag is used to keep your child warm. If the emergency is local or regional, you and your child could be evacuated from your home by your command or at the direction of the local mayor or state governor. You and your child could be sleeping in the car, the floor of a neighbor's house, a dirt floor or a stadium floor. As the parent or guardian, you need to monitor the sleeping bag when taken from storage and while being used. Ensure critters don't take up residence inside the bag.
3. This step is for selecting and purchasing the non-perishable food items. Your food options are never ending choices. You need to do your homework and select the highest quality and long lasting choices. Remember any special diet requirements. Other items to select when starting step 3. Grab a box or two of zip lock style baggies to place your items in to keep dry from water. When selecting your food choices, ensure you have a minimum of three days (9 meals) supply. Items to consider for choices could be:
Starkist tuna creations (multi-flavored)
Beef Jerky
Dried fruit packages
Single serve almond butter
Granola/protein bars
Raisins
Single serve Kool-Aid packs (Can be added to bottled or a cup of water and is a treat)
Gummy snacks/Fruit roll ups
Squeeze fruit
Powdered single serve milk packets (Add to water)
Hot chocolate packs/tea bags
Options: Trail Mix and/or nuts with (yogurt, raisons or fruit)
Remember, most long term choices are high in sodium so if you are limited on water, consider this point.
4. Step four is water. This does not mean water is priority four, just step four. Water is a difficult part of the emergency bag because you must have it yet it is heavy and can be bulky. Depending on the size of your child, how much water and what type of water carrier could be a factor. Consider water packets vs water bottles. The nice thing about water packet style storage is they will fit in individual pant pockets or coat pockets. Personally, I buy the coast guard type water packets for my preparedness resources. It has a long shelf life also. The recommended consumption level, per day is one gallon per person for cooking, drinking and hygiene. Consider keeping an empty water filtration bottle available and/or water tablets as well.
5. Step five is copies of identification (your identified and the child's also). Why yours? In the event you are separated from your child, it is important to have information how to contact you. It is important to keep key identification in a water proof bag in the event you can't return to your home or you lose everything in the home. Items to include:
Name and address
Child's name and address
Emergency Contact phone numbers
Child's vaccination and allergy records
Phone ID
Copies of your driver's license
Copies of your passport
Copies of your insurance cards
6. Step six is purchasing emergency thermal blankets (inexpensive, lightweight and small for storage). These blankets are a great addition to your survival bag. If you or your child must place the sleeping bag on the ground, a thermal blanket placed under the sleeping bag on the ground works great. https://www.amazon.com/Swiss-Safe-Emergency-Blankets-Signature/dp/B01LZN0KGB/ref=sr_1_1_sspa?crid=49JAITLSQ6FO&keywords=mylar+thermal+space+blanket&qid=1563198612&s=gateway&sprefix=MYLAR+TH%2Cstripbooks%2C138&sr=8-1-spons&psc=1 Depending on the backpack space available you could consider the heavy duty insulated thermal tarp as well - https://www.amazon.com/Arcturus-Weather-Outdoor-Survival-Blanket/dp/B01H4VAKYS/ref=sr_1_5?crid=49JAITLSQ6FO&keywords=mylar+thermal+space+blanket&qid=1563198687&s=gateway&sprefix=MYLAR+TH%2Cstripbooks%2C138&sr=8-5
7. Step seven is selecting one change of clothes for your child. Every day clothing could be bulky so sweat pants, sweat shirt and t-shirts may be best. Remember, base clothing on your location and the season you are in. Consider buying clothing a size larger than needed. Remember, you are packing the bag for a minimal three days so remember to pack three sets of underwear and socks.
8. Step eight is hiding survival cash for emergencies inside the backpack ($10). Place nine $1 bills and one dollar in quarters. Why the quarters? Your child may have access to vending machines and the quarters could come in handy.
9. Step nine is purchasing a quality head lamp that will be carried on the head and adjust to all head sizes. The hands free gear is the best way to go. Don't forget the batteries, however, if possible, buy the head gear that can be charged via batteries, solar, and USB. The more options, the better chance of keeping the head lamp powered and ready when needed.
10. Step 10, when applicable, should be to pack phones/tablets/chargers. I don't know if you have been around any young children these days but I think many are born with the IPad attached to their hand. These will be great entertainment devices. Like the head lamp above, if possible, obtain solar powered IPads or buy a solar charger for the devices. Ensure you include sets of ear buds for each device.
11. Step 11 includes hygiene items and a toothbrush kit. The kit should include travel sized shampoo, soap, and wash cloth (optional). Include a hand towel that can be used as a napkin or also a emergency compress, if needed.
12. Step 12 is antibacterial wipes. They are multipurpose and can be used for hygiene as well as toilet paper.
13. Step 13 is including an emergency whistle in the event your child becomes lost or in danger. You should discuss what the whistle is for and show them how to use it. Monitor the child practice using the whistle.
14. Step 14 will require you to separate acetaminophen and ibuprofen for your child. Place in separate baggies. Remember, during an emergency you may not have access to stores and medication. Packing Acetaminophen and Ibuprofen is helpful because they can be taken together during extreme fevers. Also, be sure to pack any regular medication your kids take (or put them in a place near the bags that can be easily grabbed on the way out during an emergency).
15. Step 15 requires you to communicate and work with your child (age dependent) to identify one or two quiet toys. You want something the child can use and keep distracted without making noise to attract attention or irritate others. You may be in a shelter or group type sheltering environment. Maybe consider a On the Go type kit that includes coloring, activity, and sticker packs. Other items that could be considered are:
Deck of cards
Pair of dice
Small pack of Lego blocks
Small puzzle packs
Coloring sheets, paper and crayons
If space, time, and situation allows, consider a child's favorite stuffed animal or blanket.
16. These are other items to consider. Remember, weight and back pack space is key. So you may have to adjust and make choices for the situation you face. These items are:
Rain poncho
Hat and gloves
Sunglasses
Sunscreen lotion
Emergency Hand Crank solar radio
Walkie-Talkies
Mess Kit
Hand warmers
Bug spray
Glow sticks
Travel first aid kit
Conclusion - If the weight of your child's bag remains light to the carry, and space remains available, use the extra weight and space to switch off items from other bags, such as pet food and items for pets. As stated in a previous post on Preparedness for Children, don't protect your child from the topic of preparedness for disasters. Discuss your plan with your child and include them.
Be blessed. Remember, 90% of Preparedness is Awareness. Get prepared today.


Ms Patty, thanks much. You helping your daughter build her bag will be excellent. You can communicate with her what each item is for and what each step is about. Children can be resilient. Especially when the parents are involved with them. Maybe you can get a large dog that could pull a buggy or wagon for the dog supplies, the 3 year old's pack and other goodies. Ha. Take care.
Perfect, good sound advice!!! I have one child old enough (7) to carry a pack with her supplies. I think having her help build the bag will get her involved. My youngest (3) is not quite ready.
Once we are settled, I will help build her bag.